10 Late Summer to Fall Nails Ideas That Will Instantly Elevate Your Look
You want nails that bridge sun-soaked days and crisp evenings without feeling forced or fussy. This guide shows you easy, stylish late-summer to fall nail ideas so you can pick a look that fits your mood, plans, and wardrobe. You’ll stop guessing which colors or finishes work together and start choosing designs that look polished from brunch to back-to-school and beyond.
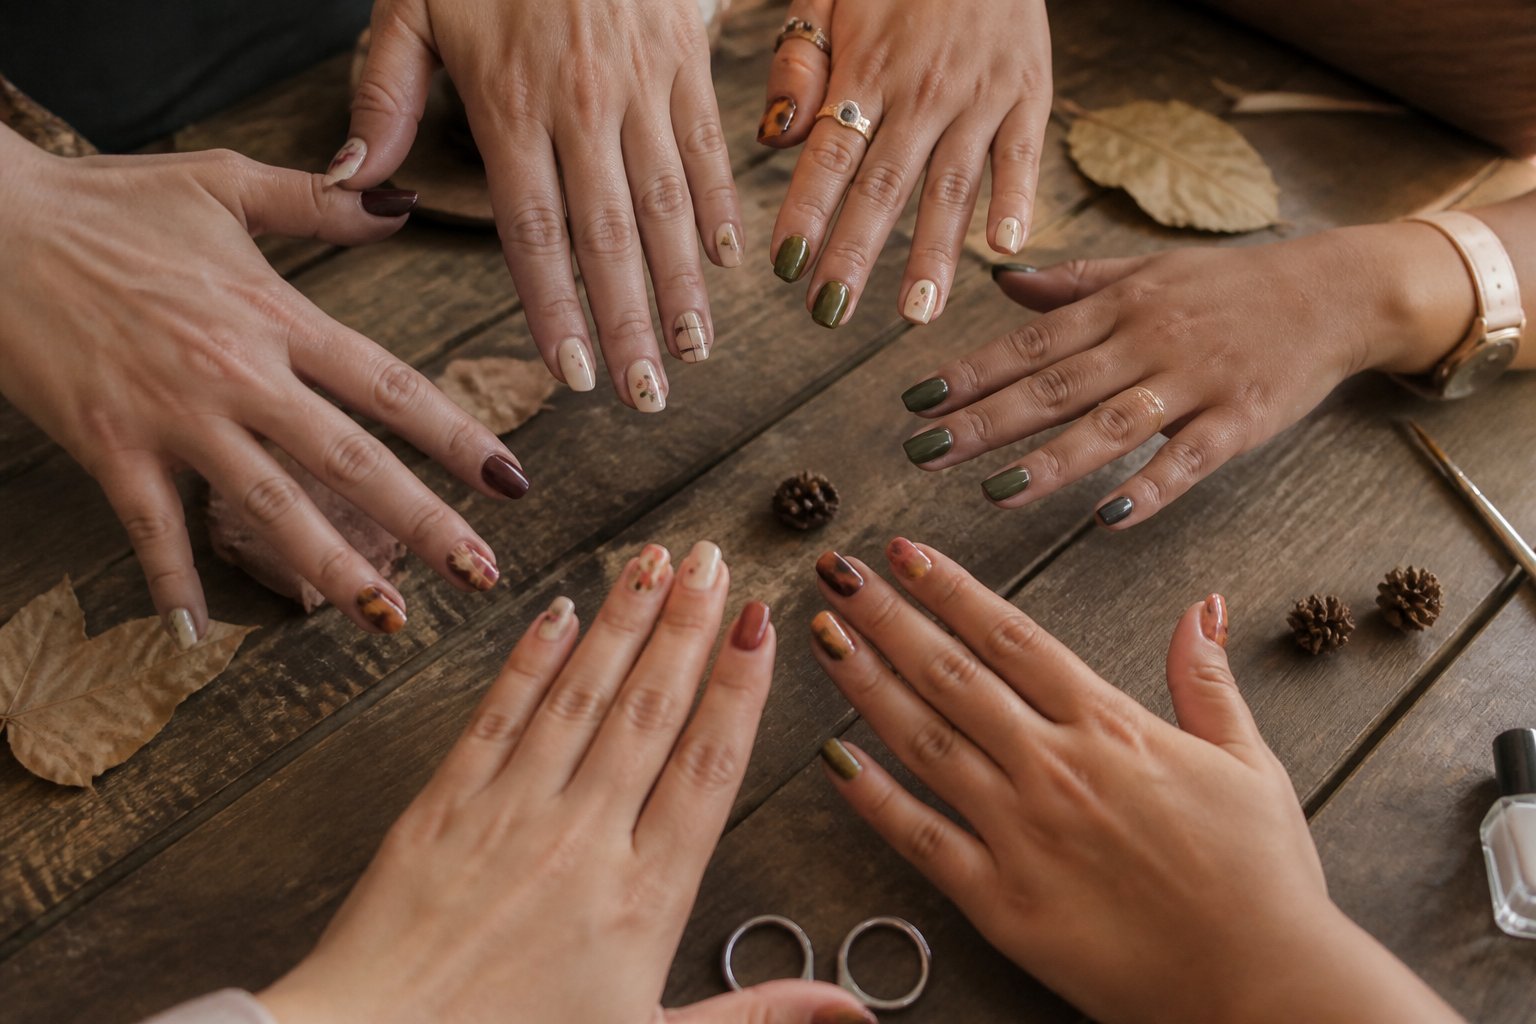
Think of this as a friendly nail pro at your side: expect tips on color pairings, finishes to try, and small mistakes to avoid so your manicure lasts longer and looks intentional. You’ll get ideas that range from soft neutrals to richer tones, plus simple art touches that add seasonal flair without extra fuss.
1) Terracotta French with matte finish
Intent: tutorial and idea. Try a terracotta French with a matte topcoat for a warm, modern look that works from late summer into fall. Start with a clay-leaning terracotta on almond or oval nails to keep the tip contrast soft but visible.
Paint the nail bed a sheer nude or pale peach first; it makes the terracotta crescent pop without harsh lines. Use a thin brush for the French tip and aim for a soft, rounded smile line rather than a sharp edge.
Common mistake: using glossy topcoat over matte polish — it kills the cozy feel. If you get a streaky matte, buff lightly and reapply thin layers. For a subtle twist, add one matte terracotta accent nail with tiny negative-space dots near the cuticle.
Try this at home or show the photo to your tech. Book a touch-up after two weeks to keep the shape crisp.
2) Sage green almond nails with gold foil accents
Idea: a calm sage base on almond-shaped nails with scattered gold foil for a chic late-summer-to-fall look. This mani balances soft earth tones and a touch of sparkle so it works for daytime plans and dressier evenings.
Start with two thin coats of sage green polish for even coverage. Press small pieces of gold foil onto tacky topcoat or use foil transfer glue; avoid large flakes that can lift or feel sharp.
Common mistake: overloading every nail with foil. Instead, place foil on one or two accent nails or near the cuticle for a polished vibe. Seal with a glossy topcoat and cure fully if you use gel to prevent chipping.
If you want variety, try matte topcoat on alternate nails and leave the foil glossy for contrast. Book a trial or practice on tips to get placement right. For inspo and layout ideas, check a curated gallery of sage nail designs that blends earthy tones with elevated styles (https://thepinkissue.com/sage-green-nails/).
3) Caramel brown glossy coffin nails
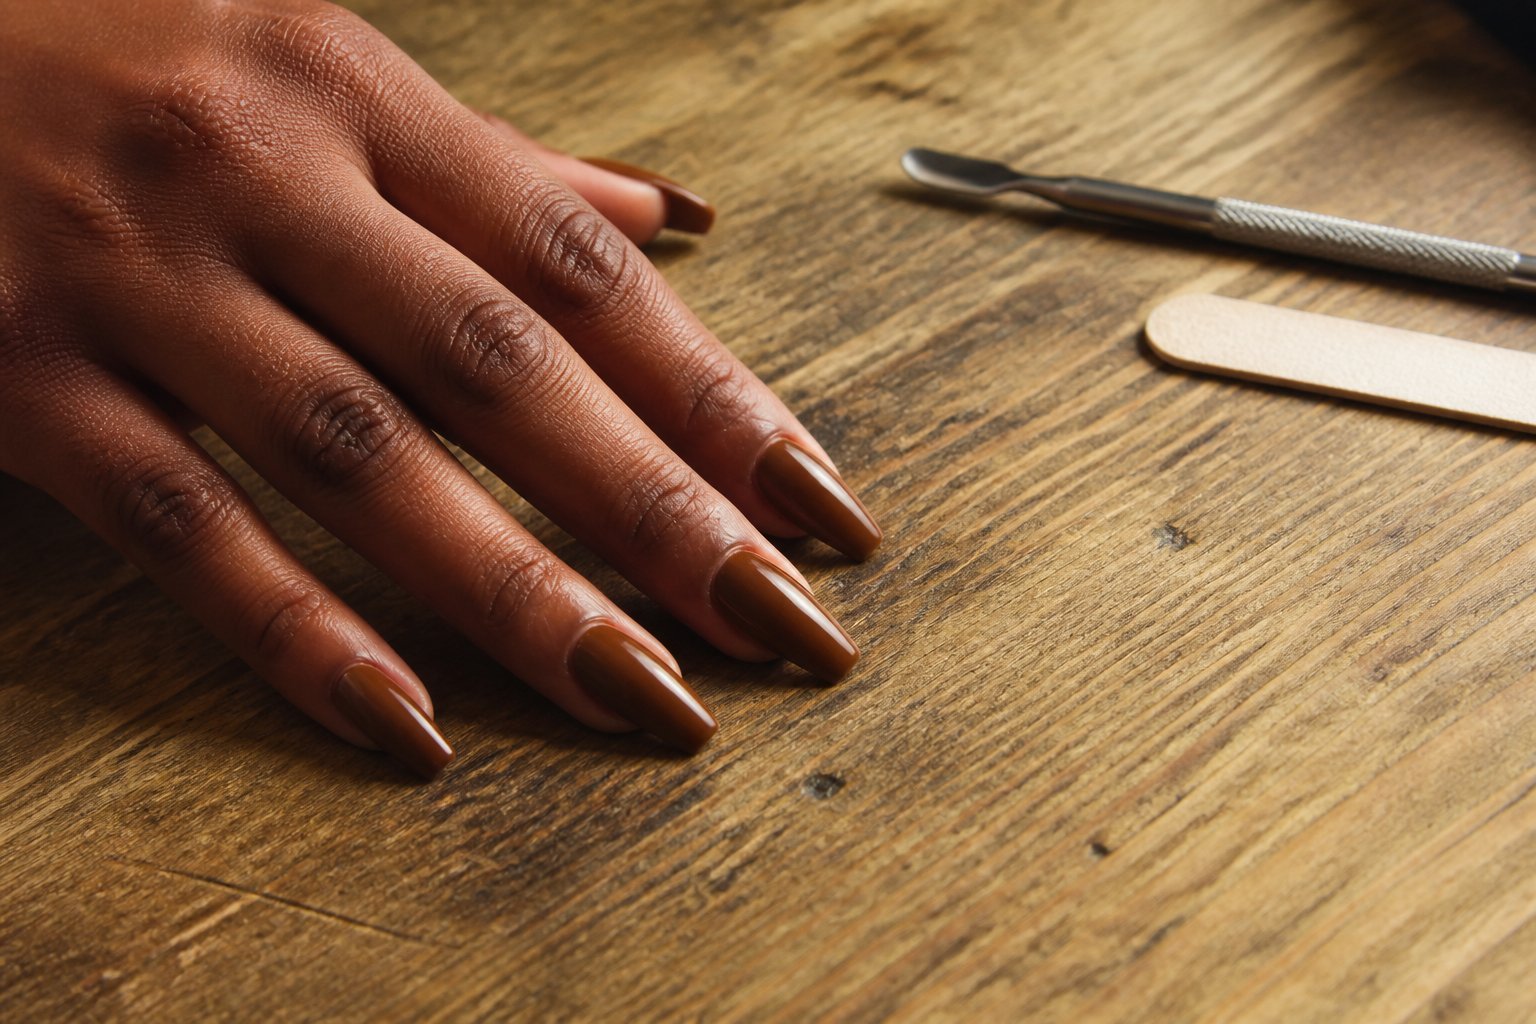
Choose this look when you want warm, wearable drama — a glossy caramel brown suits both casual and dressy late-summer events. Start with a strong base coat to prevent staining, then apply two even coats of a rich caramel polish for full coverage.
Add a thin top coat and cure fully if you use gel; the shine makes the color feel luxe and keeps edges from chipping. Try one marble or gold-foil accent nail to lift the set without overpowering the warm tones.
Common mistakes: skipping nail prep, using thick layers, or skimping on top coat, which all shorten wear. If your nails are short, keep the coffin shape slightly tapered so it still looks elegant. Test polish on one nail first to check color in different light.
4) Dusty mauve ombré to cream
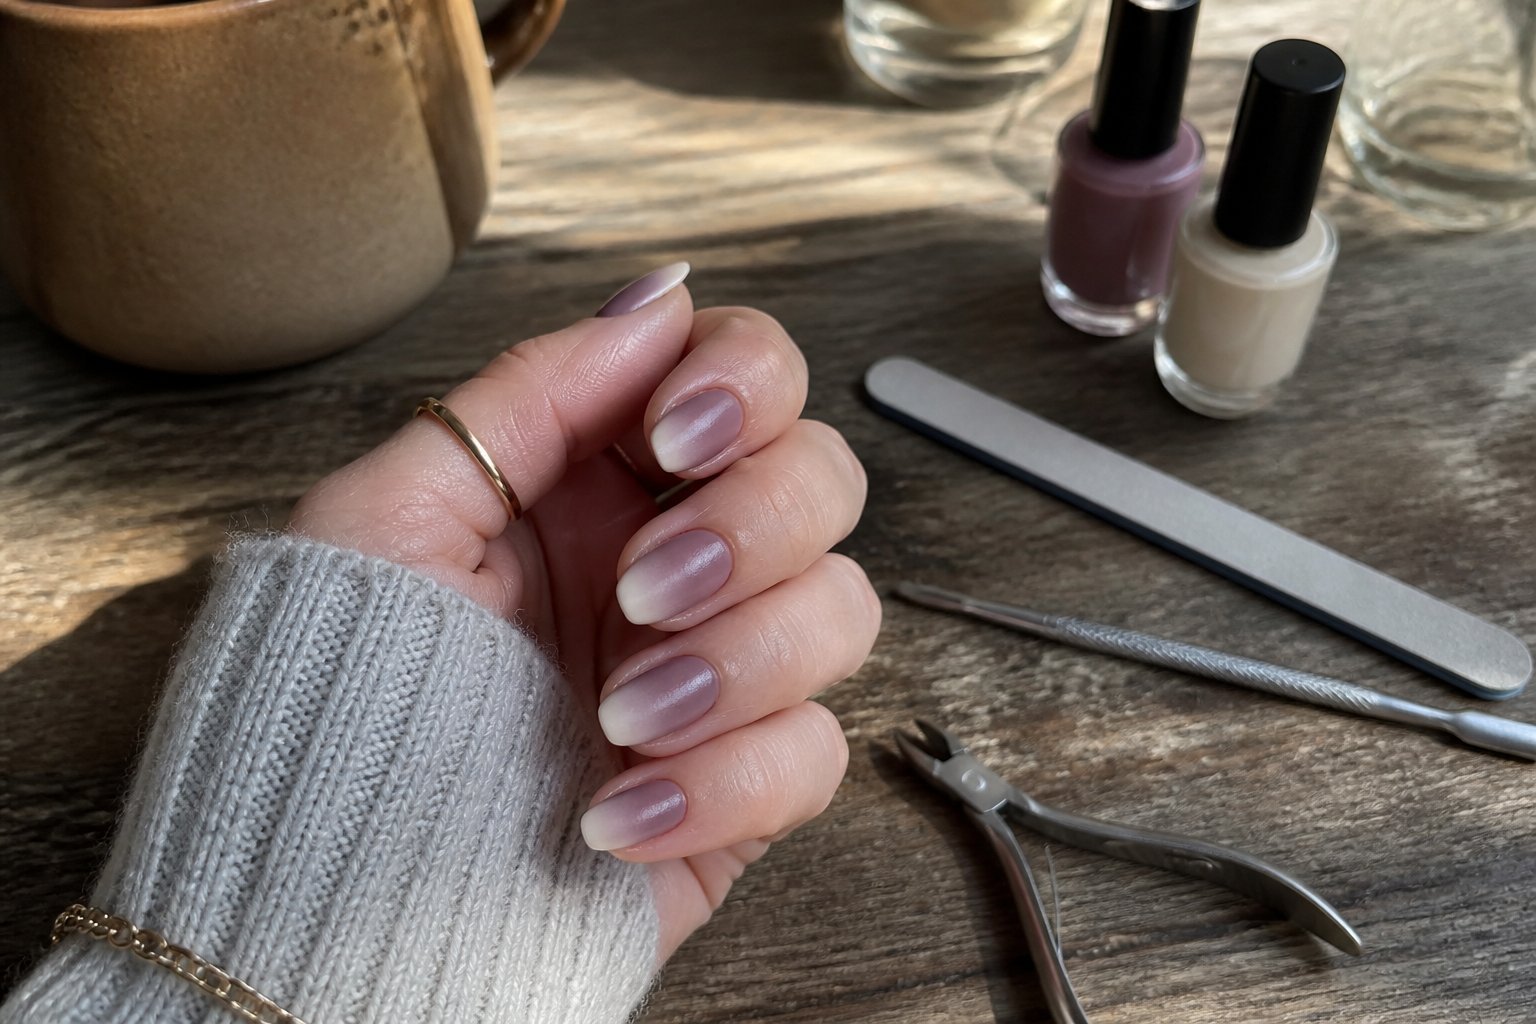
This idea is a tutorial you can try at home or ask your nail tech to do. Start with a dusty mauve at the cuticle and blend toward a soft cream at the tip for a clean, wearable gradient.
Use a makeup sponge for small nails and tap lightly to avoid harsh lines. A thin layer of top coat between layers helps smooth the blend and prevents streaks.
Common mistake: overloading the sponge with polish. That creates bumpy texture and slow drying. Keep strokes light and cure each thin layer if you use gel polish.
Try adding one glossy accent nail or a tiny gold foil near the lunula for a subtle lift. Book an appointment or practice on a press-on set to perfect the fade.
5) Sunset orange tiny floral tips
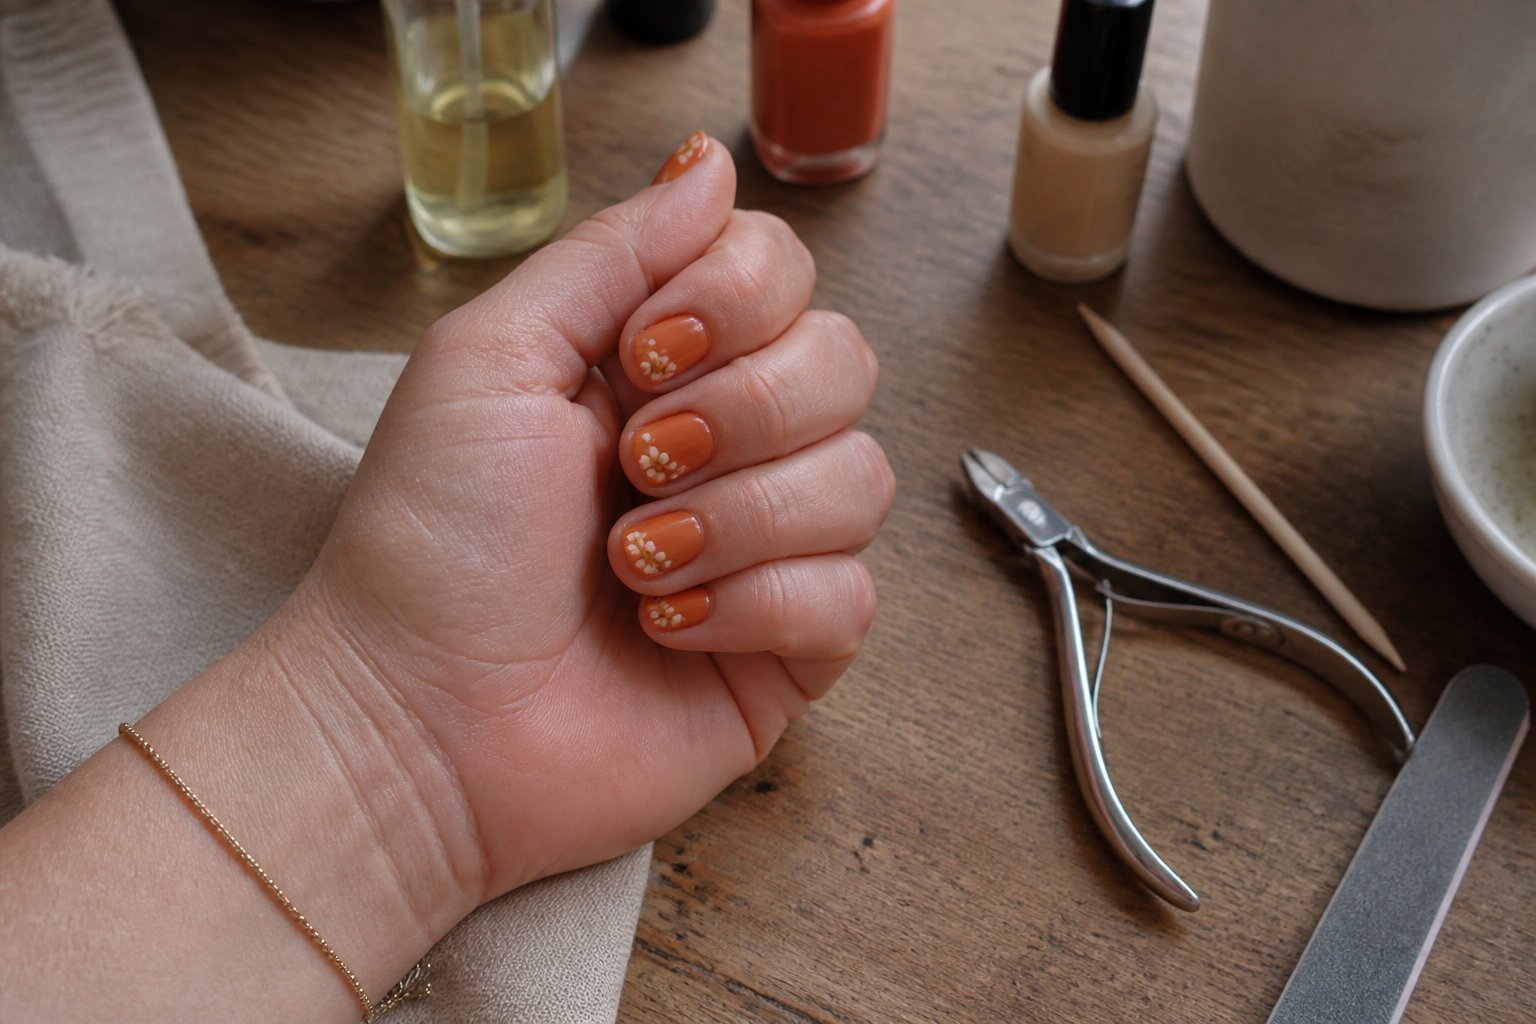
Idea: a delicate tutorial for tiny floral tips that blend sunset orange with nude bases. You get a wearable look that reads seasonal without shouting for attention.
Start with a sheer nude or pale peach base. Paint thin crescent tips in a warm sunset orange, then add tiny white or cream flowers with a dotting tool—two to three petals each keeps them small and chic.
Avoid overloading the nail. Too many blooms will clutter short tips and look amateur. Use a thin brush for petal edges and a small dot of gold or brown in the center for depth.
Common mistake: thick layers of polish that hide the floral detail. Let each layer cure, and finish with a glossy topcoat to protect the art. Try this on one hand first to fine-tune scale, then repeat.
6) Sheer nude base with abstract rust swirls
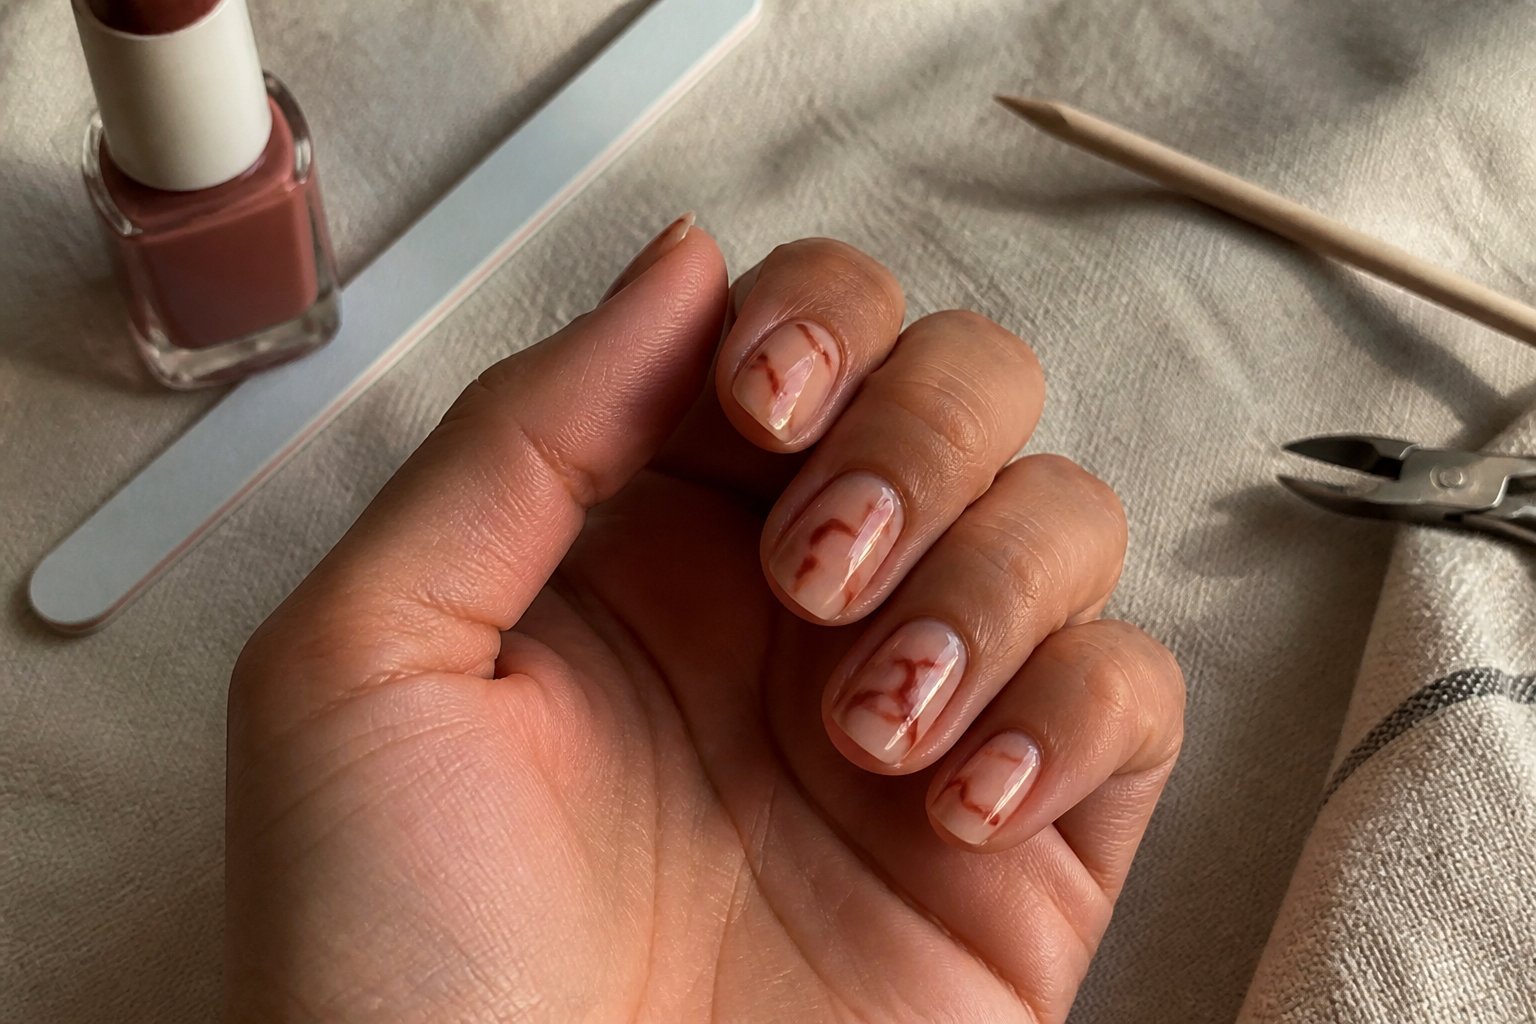
Idea: use a sheer nude base and add loose rust-colored swirls for a chic late-summer-to-fall look.
Start with a thin sheer nude layer to let your nail bed show through. This keeps the design soft and wearable for work or weekend plans.
Paint irregular rust swirls with a small brush. Vary line thickness and leave gaps so the nude peeks through; this makes the look modern, not busy.
Common mistake: overworking the swirls until they look muddy. Stop after two or three confident strokes per nail. Add a tiny shimmer or matte topcoat depending on whether you want glow or texture.
Try one accent nail with a metallic gold dash to lift the palette. Book a salon photo or save a clip for your tech if you want to recreate it later.
7) Olive green negative-space half-moon
Idea: a chic tutorial you can copy at home or ask your tech to do. Start with a thin natural crescent at the cuticle, then paint an olive green arc that leaves the half-moon bare. This keeps the look modern and easy to wear.
Use a fine brush or a French-tip sticker to mark the half-moon. A common mistake is making the crescent too large—keep it small for balance. Matte olive with glossy tips makes the design pop without extra fuss.
Try gold foil or a tiny dot at the crescent for a luxe touch. If you’re short on time, paint one accent nail and keep the rest solid olive. Test colors on a nail wheel first to pick the right olive for your skin tone.
8) Warm beige stiletto with pearl sheen
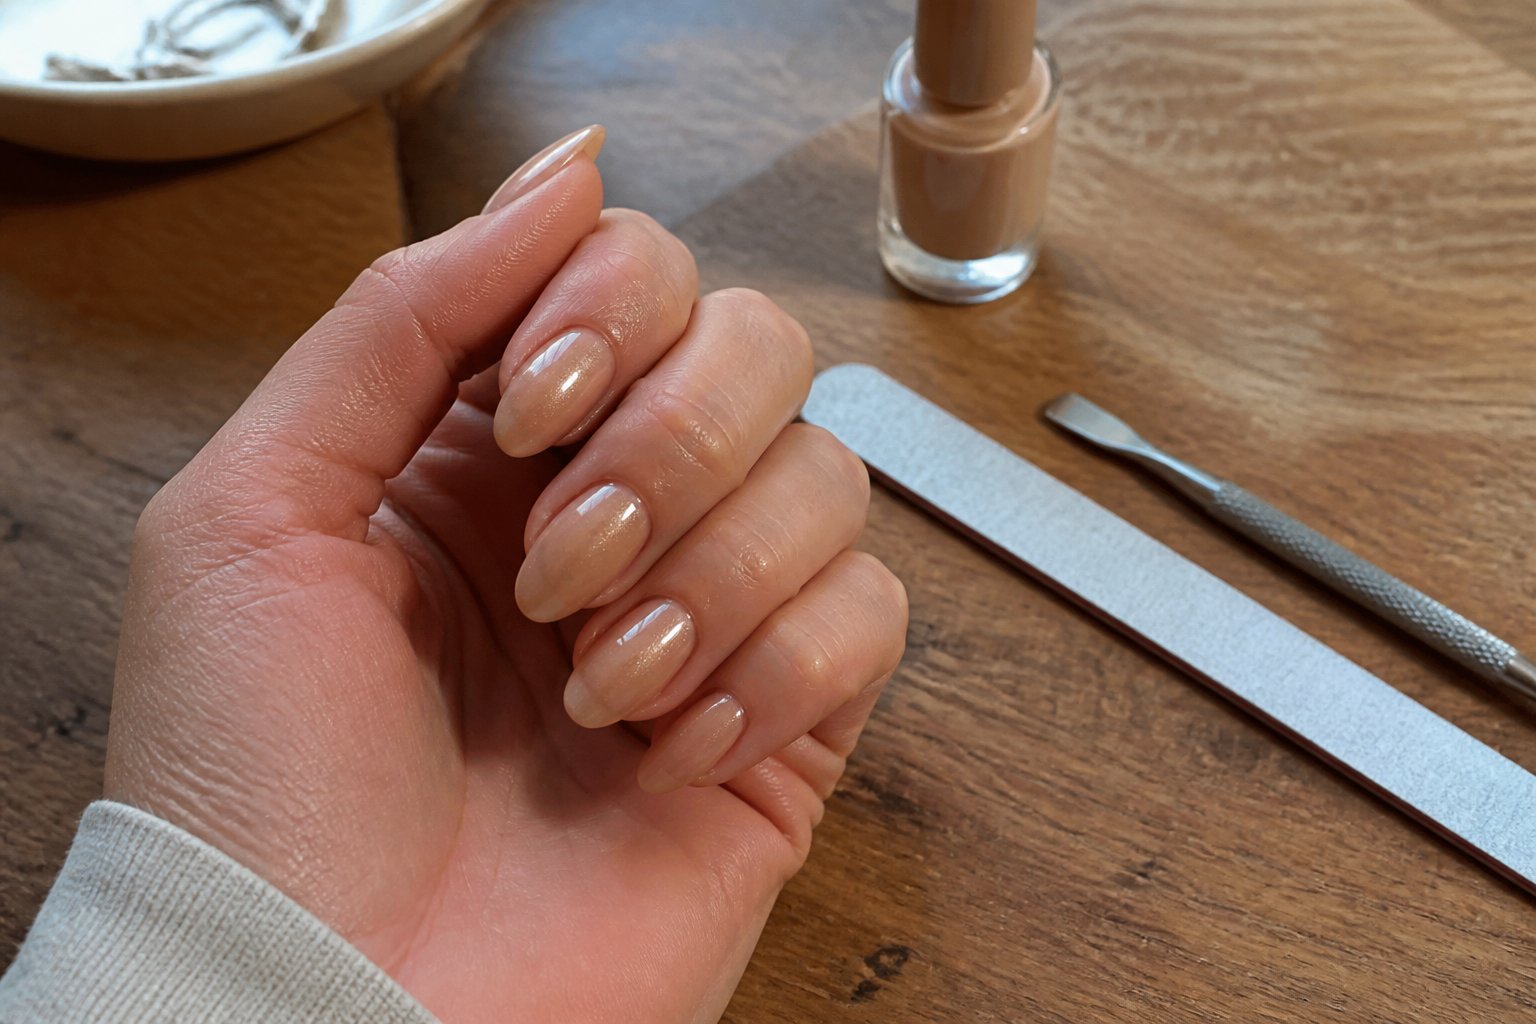
Intent: tutorial and idea. Choose a warm beige base that flatters your skin tone; this shade reads cozy and grown-up. Paint in thin coats to avoid streaks, then cure or dry fully between layers.
Add a soft pearl sheen topcoat for a subtle glow that catches light without flashing. Apply one thin glossy layer, then a second very light mist to build depth. Avoid heavy shimmer — it can look chalky on beige.
Common mistake: overfiling the point. Keep the stiletto tip balanced so the nail stays wearable. If you chip tips, touch up with the same beige and seal with the pearl topcoat.
Try pairing one accent nail with a tiny gold dot near the cuticle for a chic, polished touch. Give it at least 30 minutes before using your hands to prevent dents.
9) Copper chrome accent on muted terracotta
Intent: tutorial and idea.
Choose a muted terracotta base to keep the look warm but low-key. Apply two thin coats for even color; thick layers can streak or peel.
Add copper chrome as an accent on one or two nails, or as a slim French tip. For best shine, buff the nail surface lightly, use a no-wipe top coat, and press the chrome powder on with a sponge applicator.
Common mistakes: overworking the chrome and leaving edges unsealed. Seal the chrome with a durable glossy top coat and cap the free edge to prevent chipping.
Try alternating textures—matte terracotta with a mirror copper ring finger—for a modern contrast that still reads autumnal. If you DIY, practice on a nail wheel first to get pressure and timing right.
10) Soft khaki with thin gold striping tape
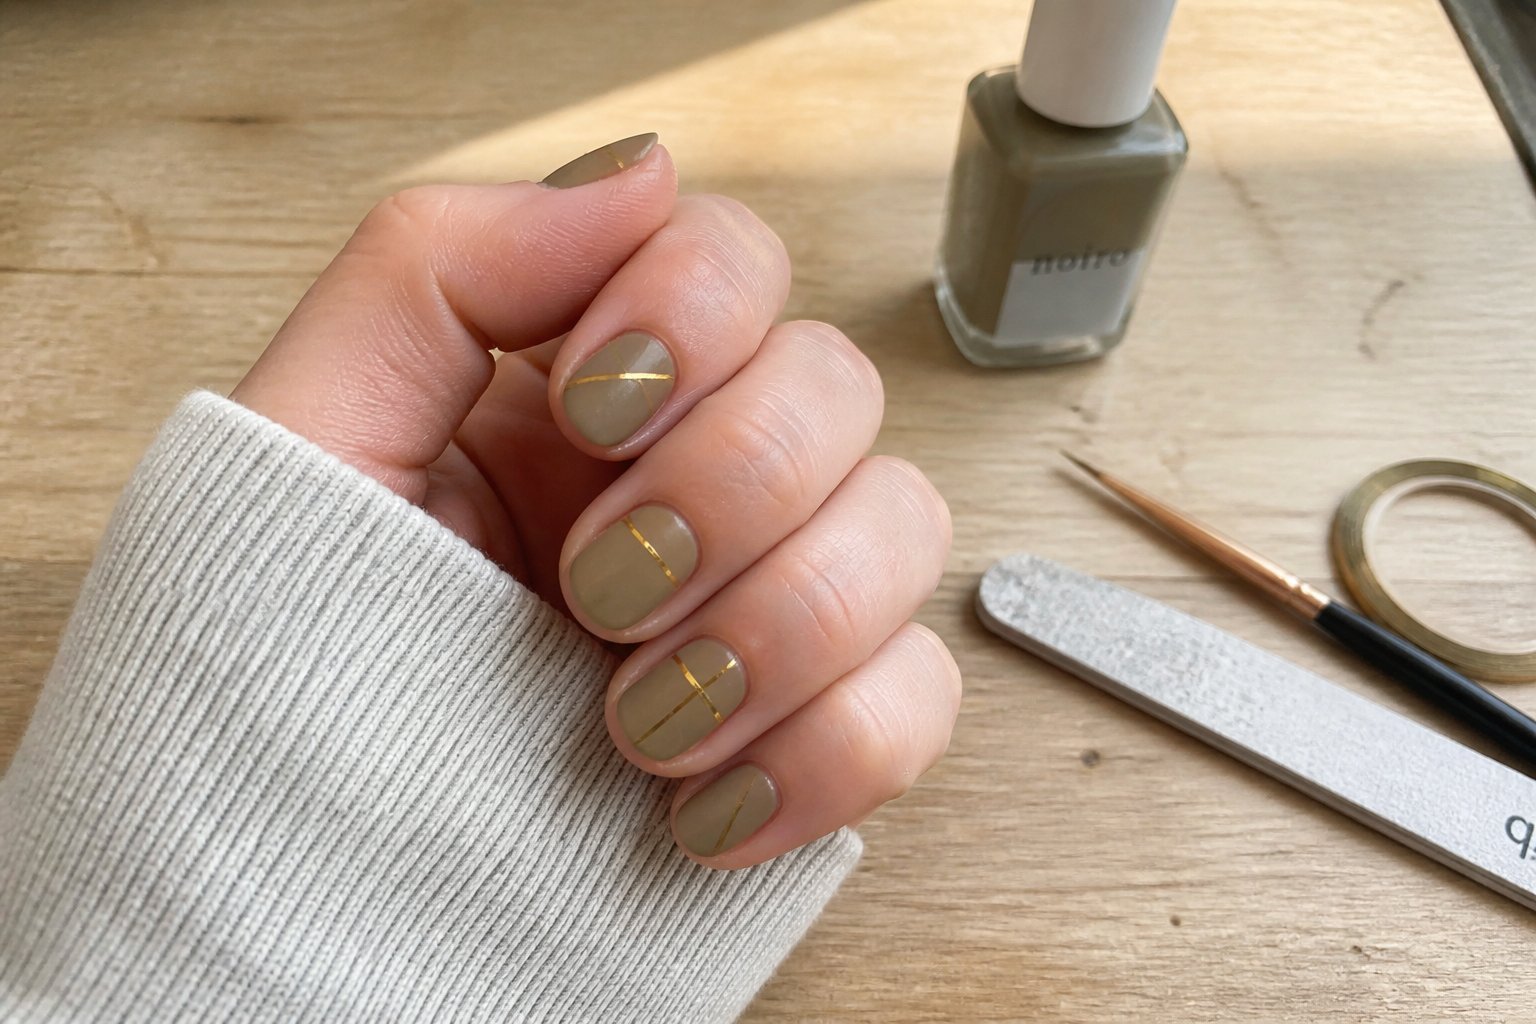
Tutorial: paint your nails a soft khaki base for an easy, grown-up look that moves from warm days into crisp evenings. Apply two thin coats for even coverage and let each dry fully to avoid bubbling.
Use thin gold striping tape to add clean lines. Place one vertical or diagonal stripe on each nail, press edges firmly, and seal with a glossy top coat. This keeps the tape from lifting and creates a salon-finish shine.
Common mistake: using wide tape or skipping the top coat — both lead to peeling. If tape wrinkles, remove and reapply; patience beats rushing. Try alternating finger accents, like a full gold tip on the ring finger, to add subtle contrast.
If you want inspiration, browse late-summer-to-fall nail galleries for color pairings and finishes at this transition nail ideas roundup.
Seasonal Color Palettes
Pick colors that bridge warm, sunlit tones and deeper, cozy shades. Focus on specific colors, finishes, and simple combos that you can recreate at home or ask for at the salon.
Transition Shades for Late Summer
Intent: guide you to pick wearable colors that still feel summery while easing into fall.
Think warm off-white, muted coral, and soft apricot as base shades. These keep nails bright without the starkness of pure summer white. Add a sheer gold shimmer or a warm beige French tip to keep the look sun-kissed. For short nails, try a single neutral cream with a tiny metallic dot near the cuticle — it looks polished and low-maintenance.
Pairing tip: match a muted coral with a sliver of rust at the ring finger for subtle contrast. Avoid neon or icy blues; they conflict with the season’s warmer light. A common mistake is using high-gloss only—mix matte and glossy finishes for depth. If you DIY, apply two thin coats and a quick-dry topcoat to prevent tip wear.
Rich Hues for Fall Inspiration
Intent: give you bold, wearable color ideas that read autumnal without feeling heavy.
Choose deep rust, olive green, and chocolate brown for instantly seasonal nails. These read as fall but still suit late-summer skin tones. Try a deep rust matte on most nails with one glossy olive accent nail to add interest. Metallic bronze or muted copper work well as tiny geometric accents or thin French lines.
Styling tip: balance saturation—use one saturated color plus a neutral or metallic to avoid overpowering your hands. A frequent error is painting all nails dark without contrast; add a light negative-space design or a single shimmer nail to break it up. At the salon, ask for gel in “rust” or “olive” swatches; that helps you see undertones before the polish is applied.
Nail Art Trends to Watch
These looks mix color, texture, and simple accents for nails that shift well from warm summer days to cool fall evenings. Focus on layered color, unexpected negative space, and small metallic details to keep your manicure modern and wearable.
Abstract Designs
Intent: idea — Learn to craft balanced, wearable abstract nails.
Abstract nails pair swirls, blocks, and dots in warm neutrals and jewel tones. Try a base of muted terracotta, then add irregular strokes of olive green and cream. Use a thin liner brush for crisp edges and a dotting tool for scattered accents. Keep at least one finger with negative space to avoid a busy look.
Common mistake: layering too many colors without letting each dry. That causes smudging and muddy tones. Fix that by curing or drying between layers and thinning polish slightly for smooth strokes. For longevity, seal with a glossy topcoat and add a matte accent nail if you want texture contrast.
Example: a short almond nail with a cream crescent at the base, a diagonal olive stripe, and a tiny gold foil fleck near the tip. Try that on one or two fingers before doing a full set.
Minimalist Motifs
Intent: guide — Create chic, low-effort nails that still feel seasonal.
Minimalist motifs use simple shapes—thin French tips, single dots, tiny leaves—on a soft neutral base like off-white or sheer tan. Place a single tiny leaf on the ring finger in deep rust for an autumn touch. Thin metallic lines on an index finger add polish without overpowering.
Tools you’ll need: a fine striping brush, a dotting tool, and a steady hand. Use quick-dry topcoat and avoid thick layers; that keeps lines sharp. Common mistake: making shapes too large. Small, well-placed motifs read as intentional and upscale.
Try mixing matte and gloss: matte base with a single glossy dot makes the motif pop. Experiment on one hand, then mirror the look on the other for a coordinated, low-maintenance manicure.