10 Gummy Nail Ideas for 2026: Irresistible 3D Jelly Manicures to Try
You want nails that feel playful and modern without looking overdone. Gummy and jelly manicures give you glossy, candy‑like depth that catches light and adds fun texture to every gesture. You’ll learn quick, wearable gummy nail ideas and pro tips so you can pick a look that suits your style and lasts through daily wear.
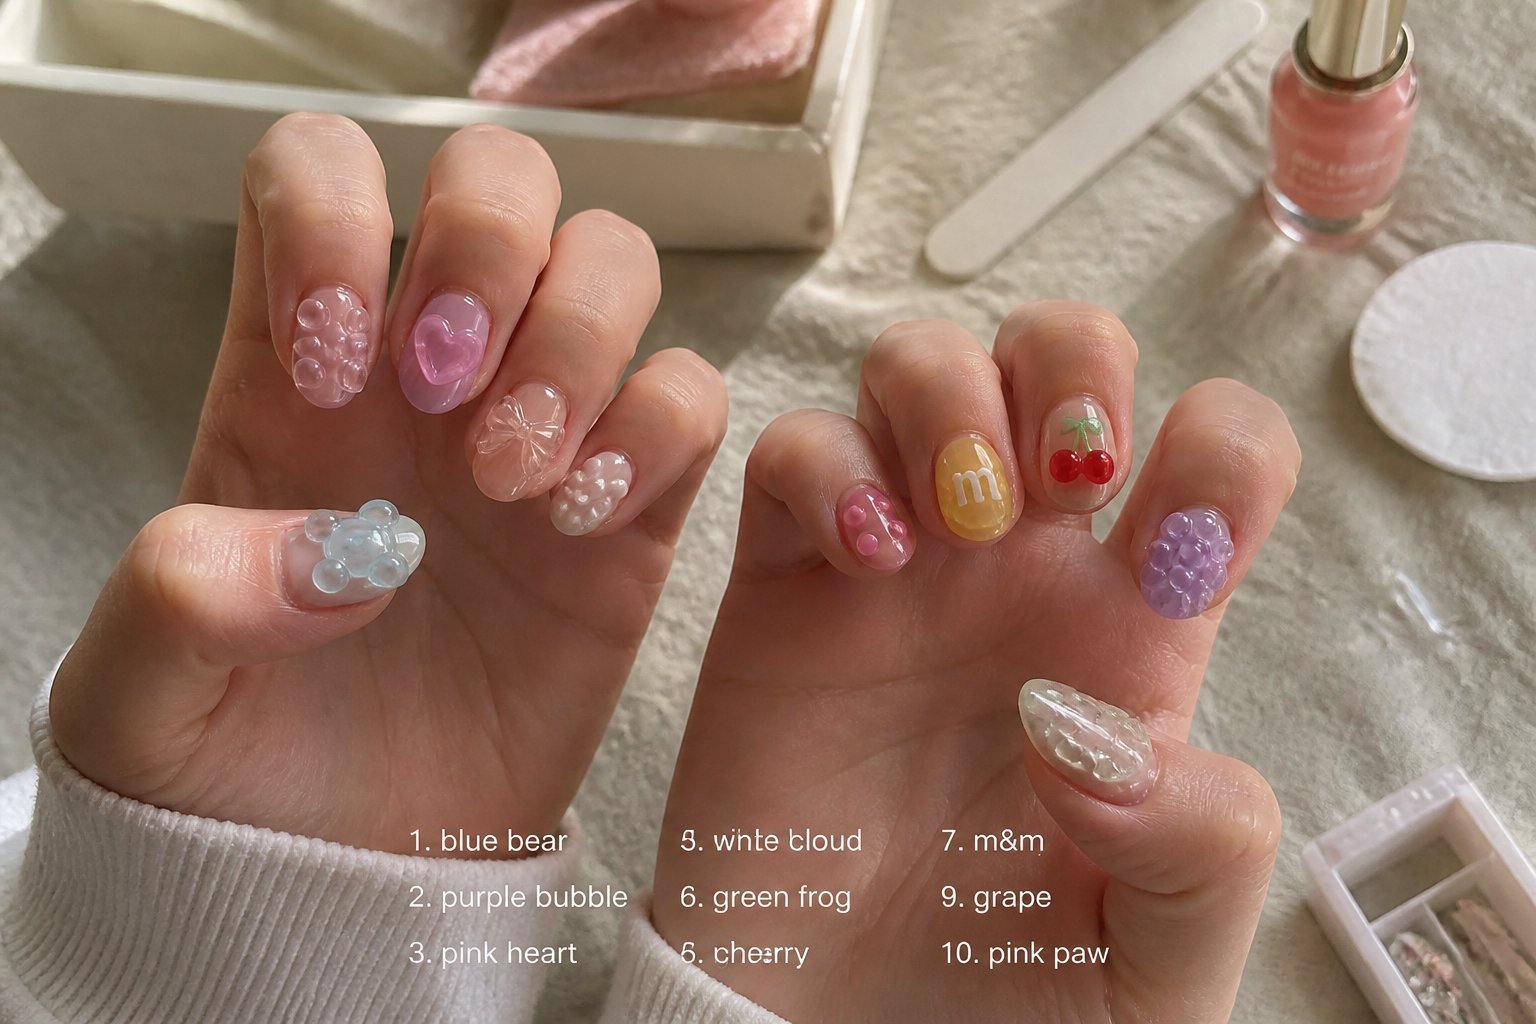
Think of this article as a short, expert guide to 3D jelly manicures—from soft, translucent pinks with pearl clusters to bold neon syrup gradients and tiny embedded charms. You’ll get clear inspiration plus practical notes on durability, common mistakes to avoid, and which styles work best for different nail lengths and occasions.
1) Translucent Pink Almond Jelly Nails with Tiny Pearl Clusters
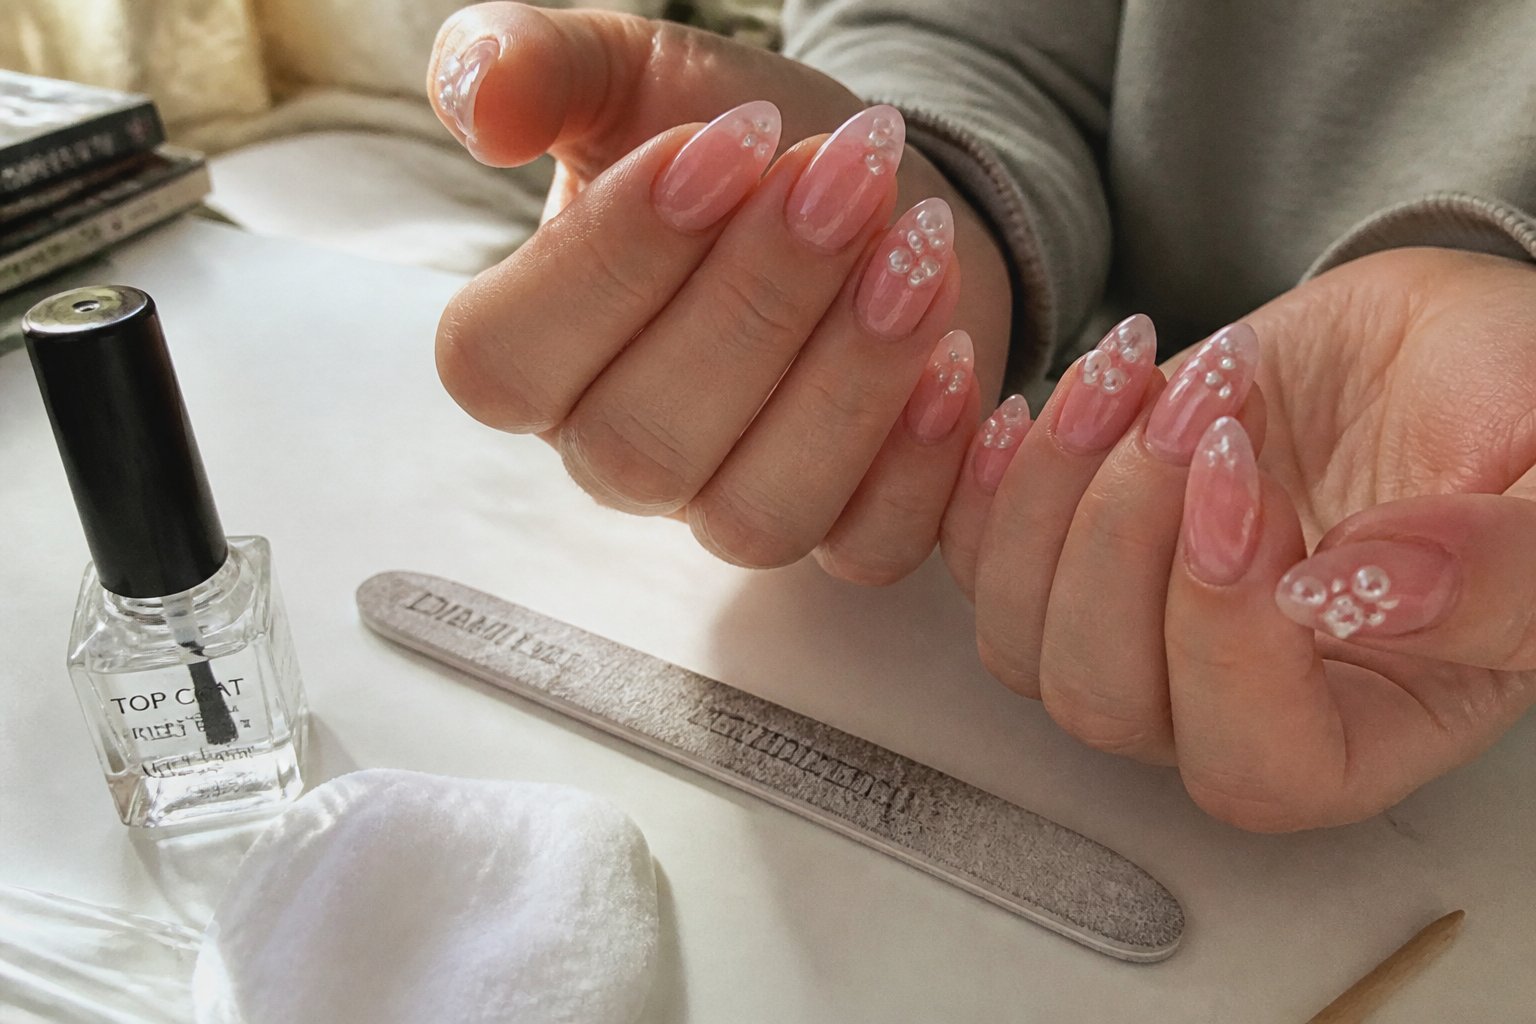
Intent: tutorial and idea. You’ll learn how to get a soft, bridal-ready jelly look with tiny pearl accents.
Start with a sheer, rose-quartz pink jelly base on medium almond nails. Apply two thin coats for depth without losing translucence. Use a glossy top coat to keep the glass-like finish.
Place tiny pearl clusters near the cuticle or along a French edge for balance. Use a dotting tool and a bit of nail glue; press gently and seal with top coat. Avoid overcrowding—three small pearls per nail reads elegant, not heavy.
Common mistake: adding thick layers that blur the jelly effect. Keep layers thin and cure thoroughly if you use gel. Try one accent nail with a pearl line to see how you like the shine.
2) Clear Gummy Nails with Embedded Miniature Gummy Bears
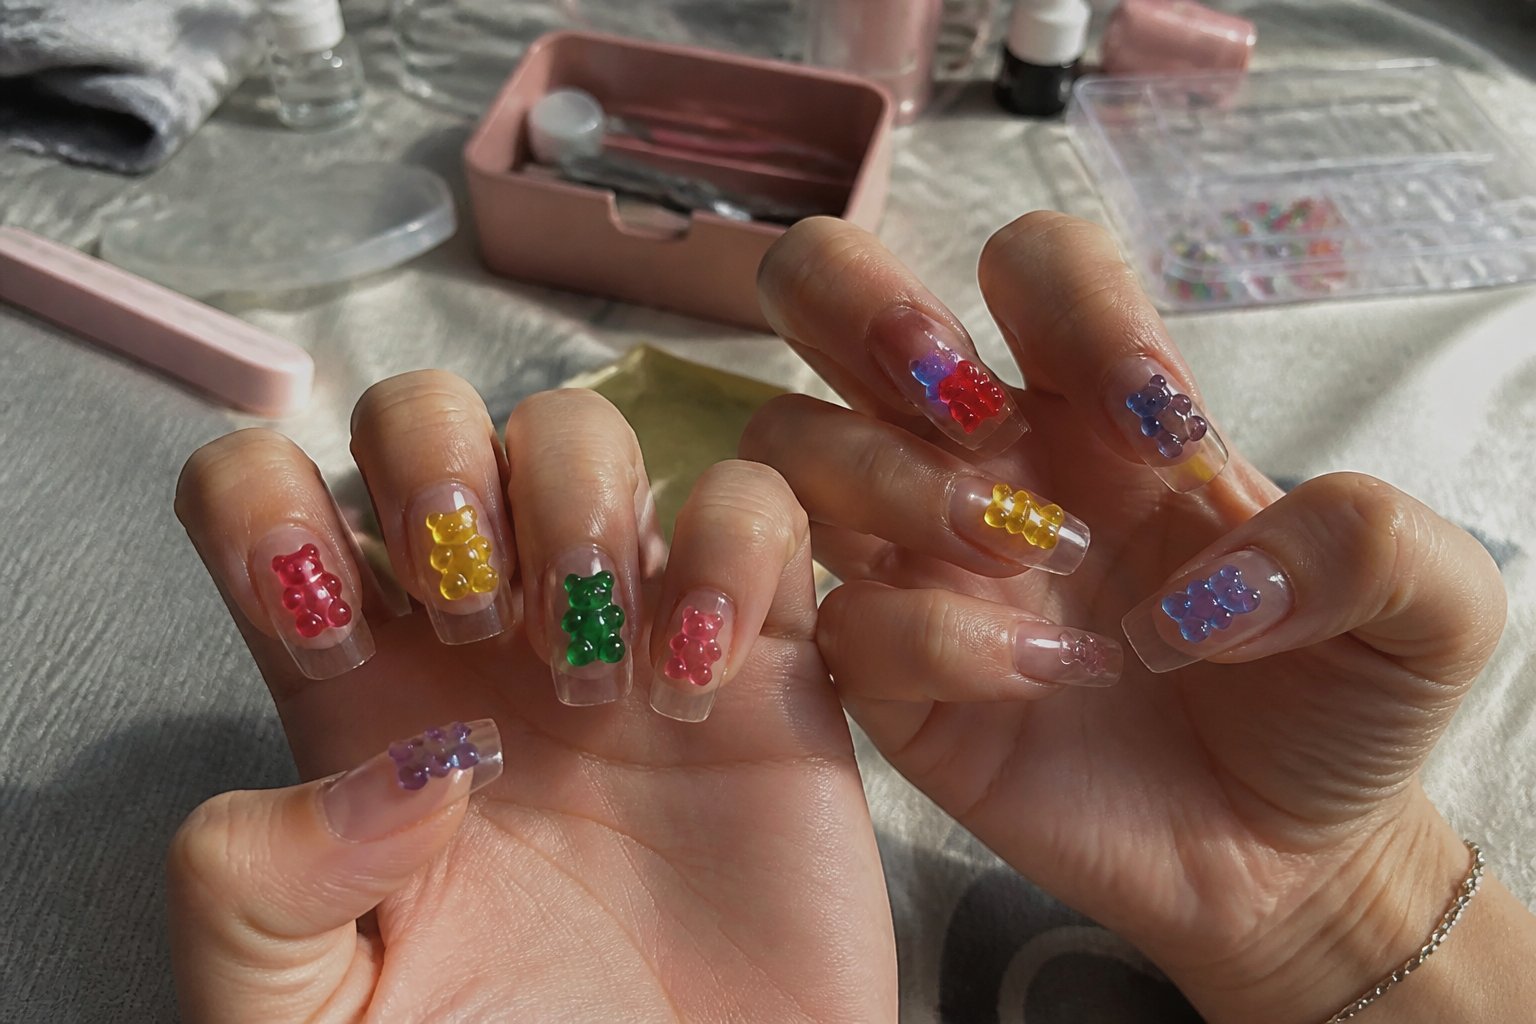
Intent: tutorial and idea. Try this to make nails that look like tiny candy jars.
Use a clear builder gel or thick topcoat as your base. Place a small silicone gummy charm or a tiny resin bear on the tacky layer, then encapsulate it with another clear gel layer. Work in thin layers to avoid a bulky, uneven dome.
Common mistake: trapping air bubbles under the charm. Press gently and cure each thin layer to keep the resin smooth. If the bear shifts, remove and reset before curing.
Keep nails wearable by using one or two accent nails instead of every finger. For charm options and inspiration, see a range of designs on this gummy bear nail ideas page: https://www.etsy.com/market/gummy_bear_nails.
Try one accent nail first, then build confidence with more 3D details.
3) Neon Gradient Jelly Syrup Nails (orange to hot pink)
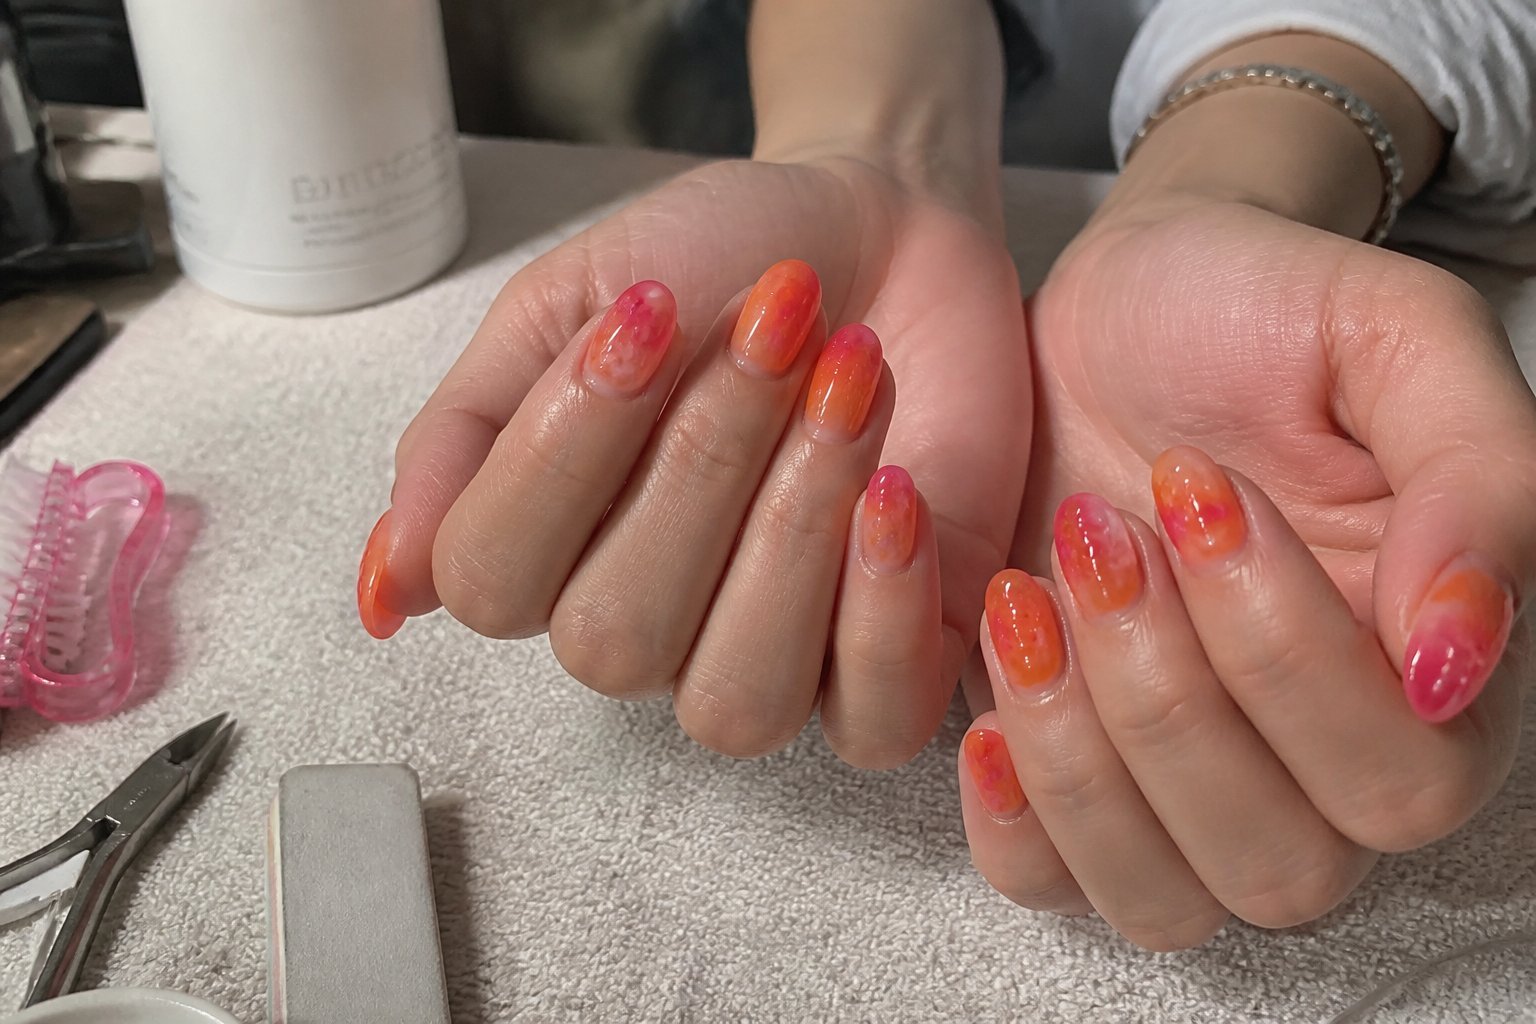
Intent: tutorial and idea. You’ll learn how to build a glossy, translucent gradient that looks like syrup sliding from orange into hot pink.
Start by painting a thin white base to make colors pop. Blend a neon orange and hot pink gel on a sponge, then press lightly toward the tip to create a smooth gradient. Cure each thin layer to avoid bubbling and keep the jelly look.
Seal with a warm, sheer jelly topcoat for that wet, syrup shine. Add a tiny dot of clear builder gel at the cuticle for depth if you want a 3D drip. Watch for thick layers—they trap air and ruin the glassy finish.
Common mistake: overworking the sponge and muddying the colors. Keep layers thin and patient. Try shorter nails first to practice the blend, then scale up. Give it a go and tweak the orange-to-pink balance until it feels right.
4) 3D Puffy Flower Jelly Nails with Raised Petal Gel
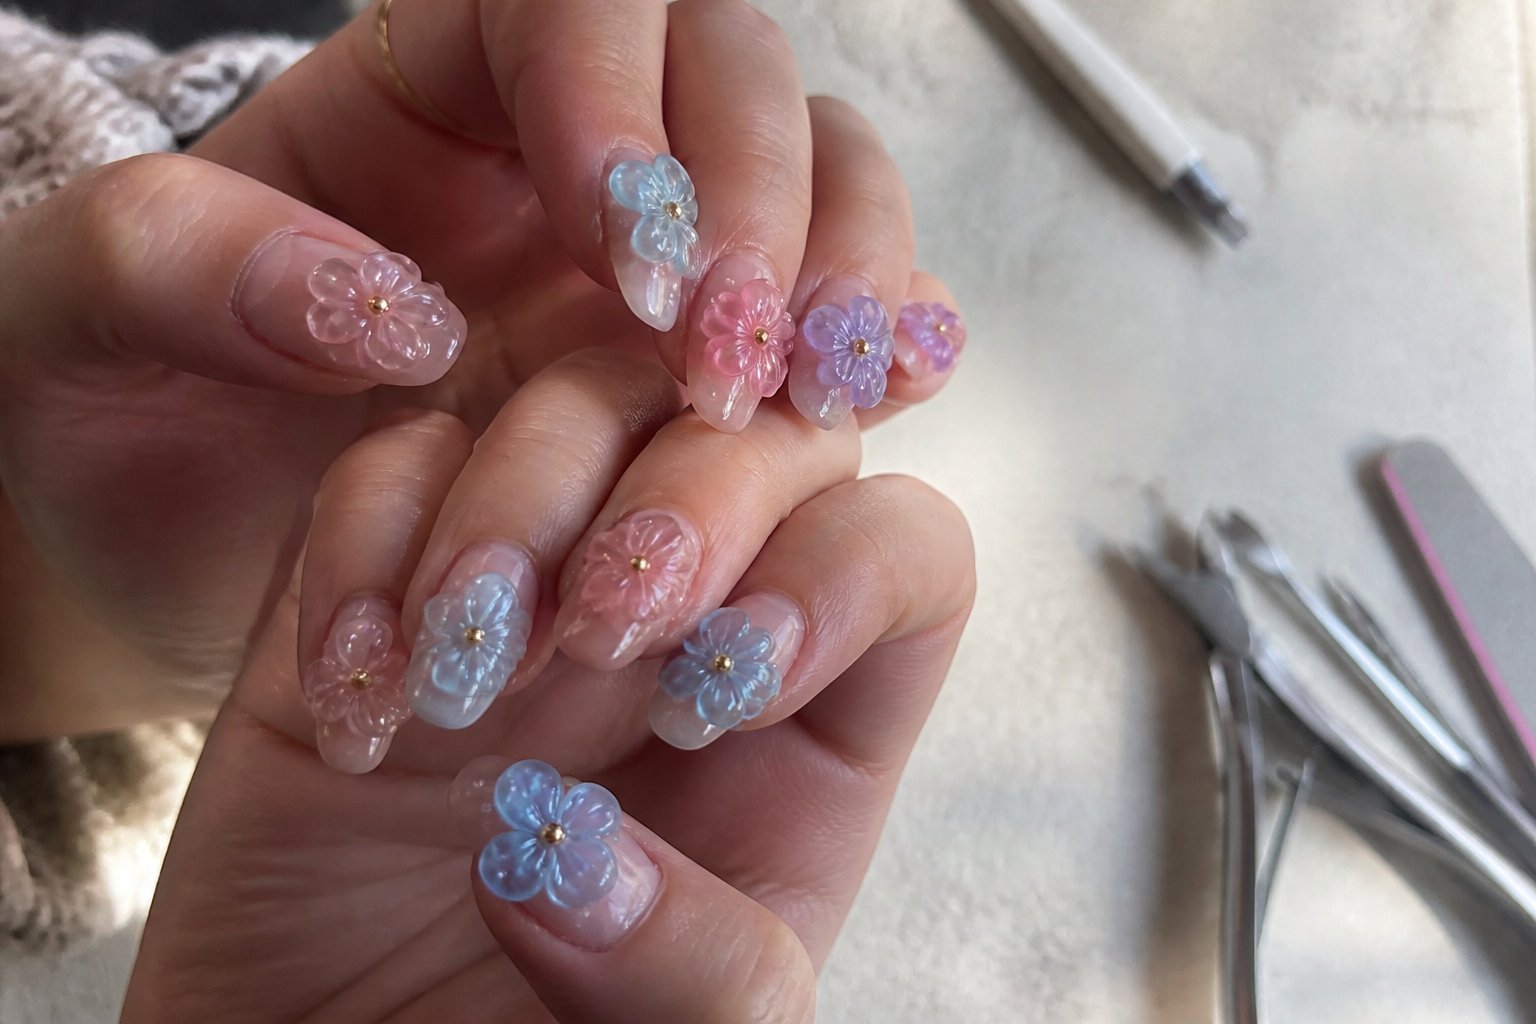
This guide shows you how to build soft, puffy flower petals using clear jelly gel and a builder gel top layer. You’ll get a playful 3D look that still feels light and wearable.
Start with a sheer jelly base color. Use a small brush and thick sculpting gel to make short, rounded petals; press slightly to create a puffy shape before curing. Layering thin to thicker petals gives depth without bulk.
Common mistake: overfilling petals. If you add too much gel, petals collapse or feel heavy. Keep each petal slightly domed and cure between additions for clean edges.
Try adding tiny glitter or a pearl center for contrast. For reference and visual ideas, see a step-by-step 3D flower nails tutorial on TikTok. Give this look a test on a practice tip before doing a full set.
5) Short Smoky Grey Jelly Nails with Silver Foil Flakes
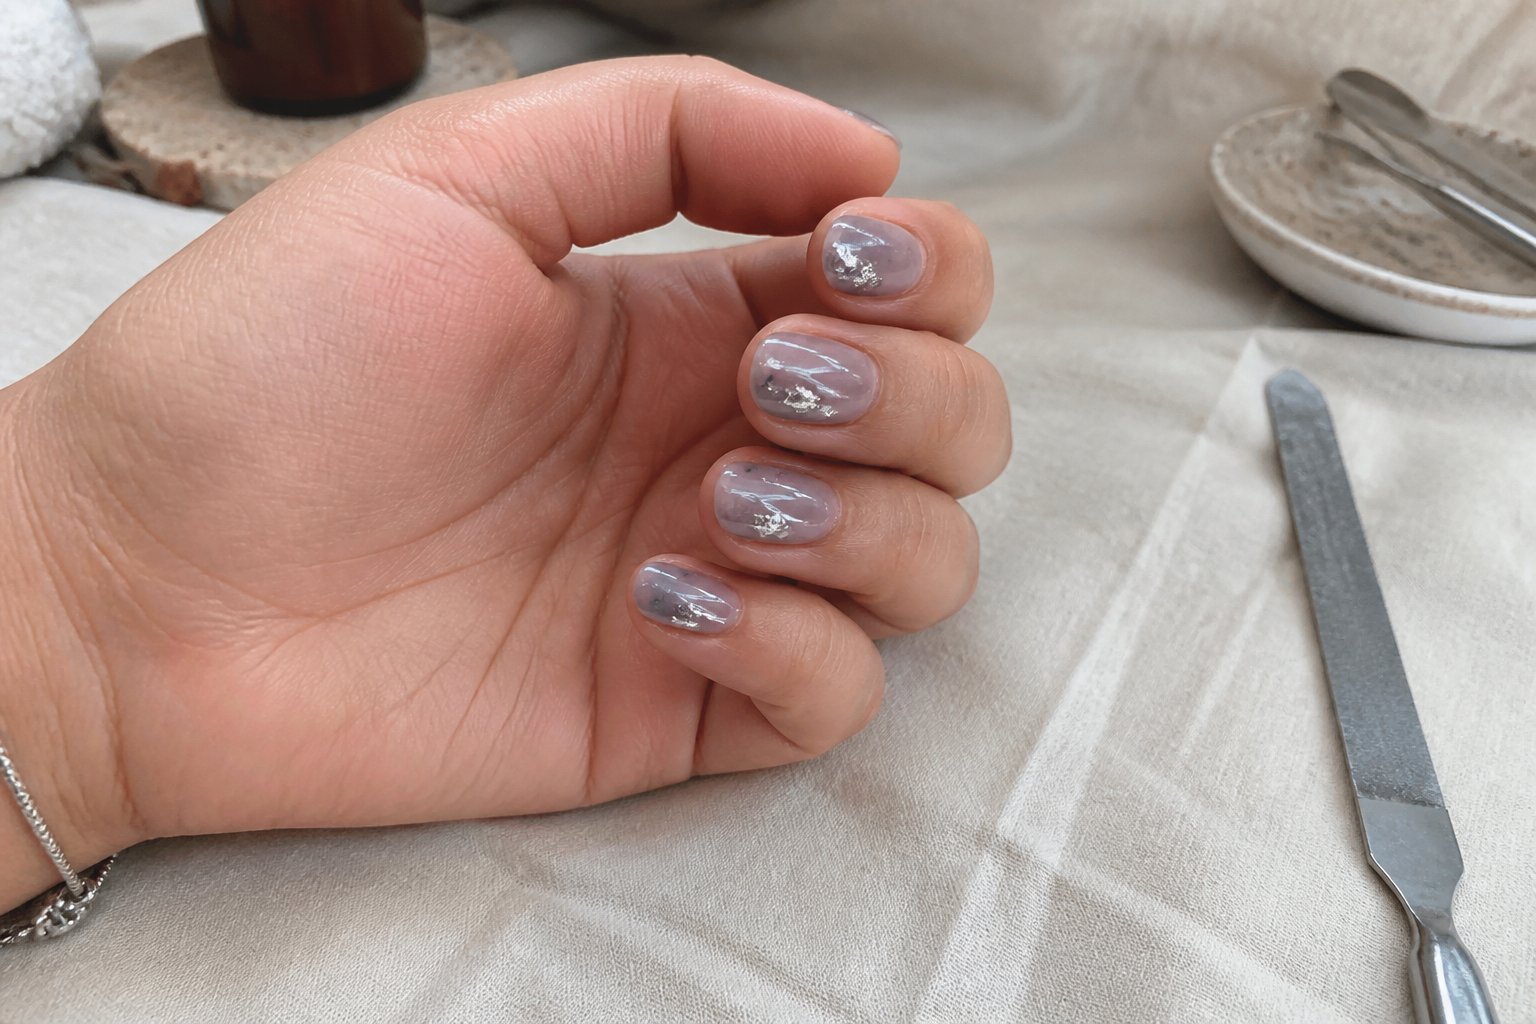
Intent: idea and mini-tutorial.
Choose short nail shapes so the smoky grey jelly looks modern and easy to wear. Apply two thin coats of a translucent grey jelly polish for depth without heaviness. Let each layer dry to avoid streaks.
Press tiny silver foil flakes onto tacky topcoat spots for scattered gleam. Use tweezers and work one nail at a time; foil can tear and pit the finish if you rush. Seal with a glossy gel topcoat to lock flakes and boost that glassy jelly shine.
A common mistake is using too-opaque grey—your jelly effect should stay sheer. If flakes clump, gently lift them and reposition. Try a single accent nail with denser foil if you want subtle drama, or keep all nails light for a minimalist look.
6) Pastel Rainbow Jelly Tips on Natural Nail Beds
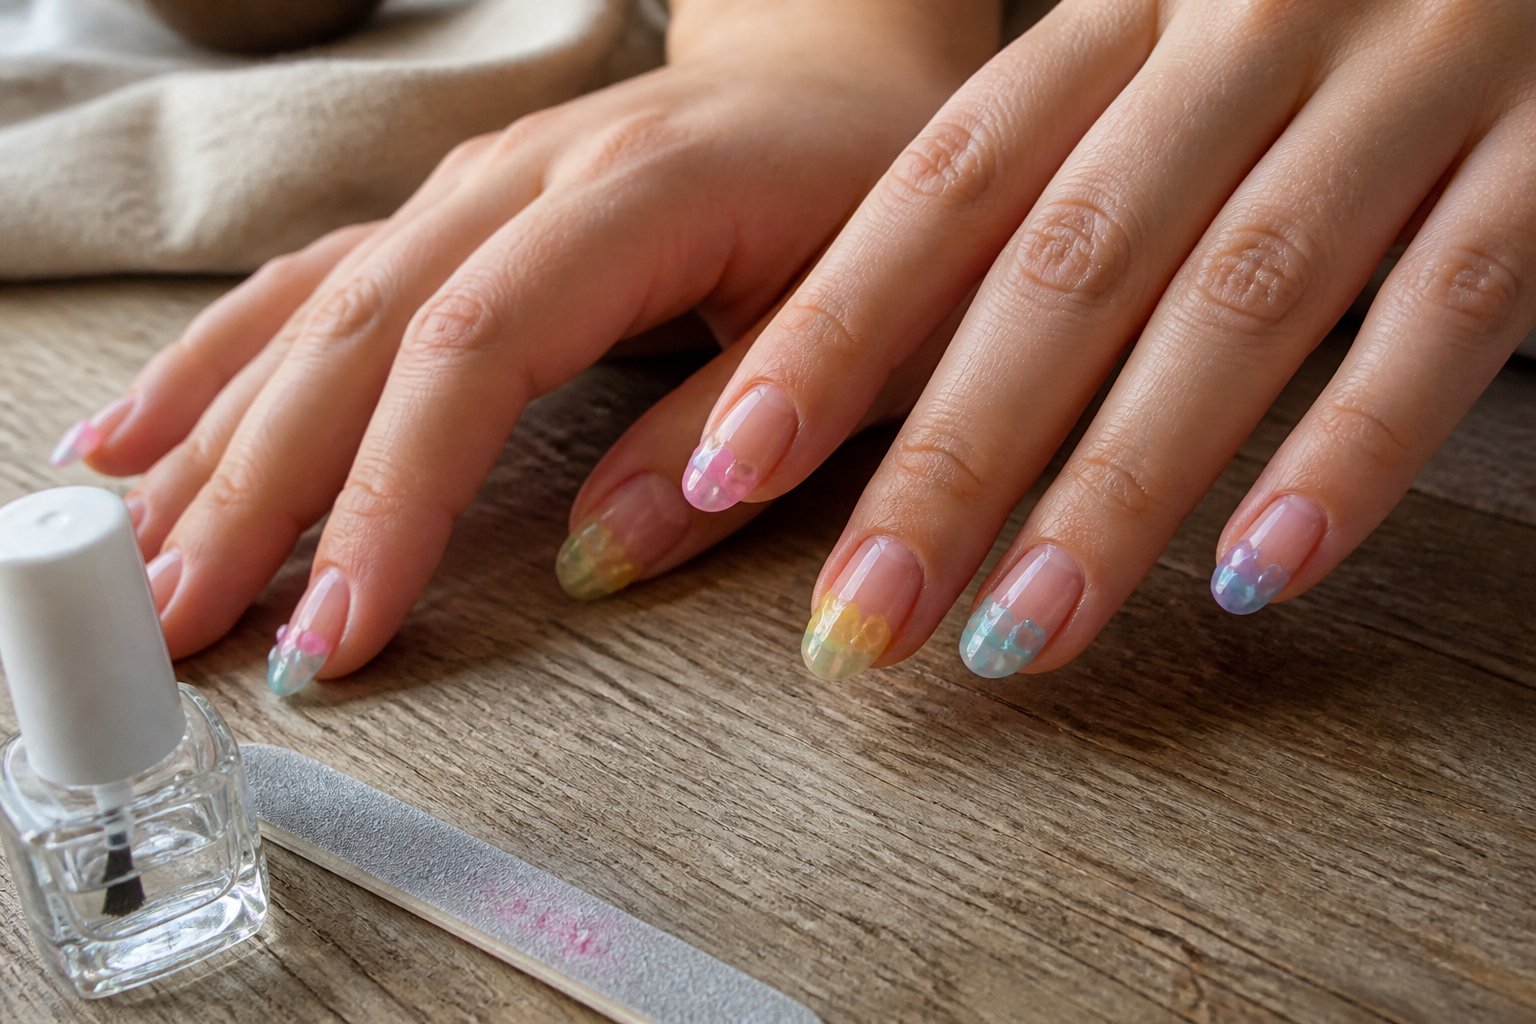
Tutorial: paint sheer, candy-like tips while keeping your natural nail visible for a softer gummy look.
Start by buffing and cleaning the nail bed. Apply a thin clear base to protect your nails; this avoids lifting and keeps the jelly effect smooth.
Pick five pastel shades and thin them with clear jelly gel or translucent polish. Use a small brush to paint short, rounded tips—leave negative space near the cuticle so your natural nail shows. Blend edges slightly for a glassy fade.
Common mistake: piling color too thick. Thin layers cure better and keep the dome subtle. If you want 3D shine, add a tiny clear builder-gel bead over the tip and cure.
Try alternating tip colors between nails for a playful set. Ask your tech for soak-off gel if you change styles often.
7) Glossy Black Jelly Base with Tiny Gold Star Charms
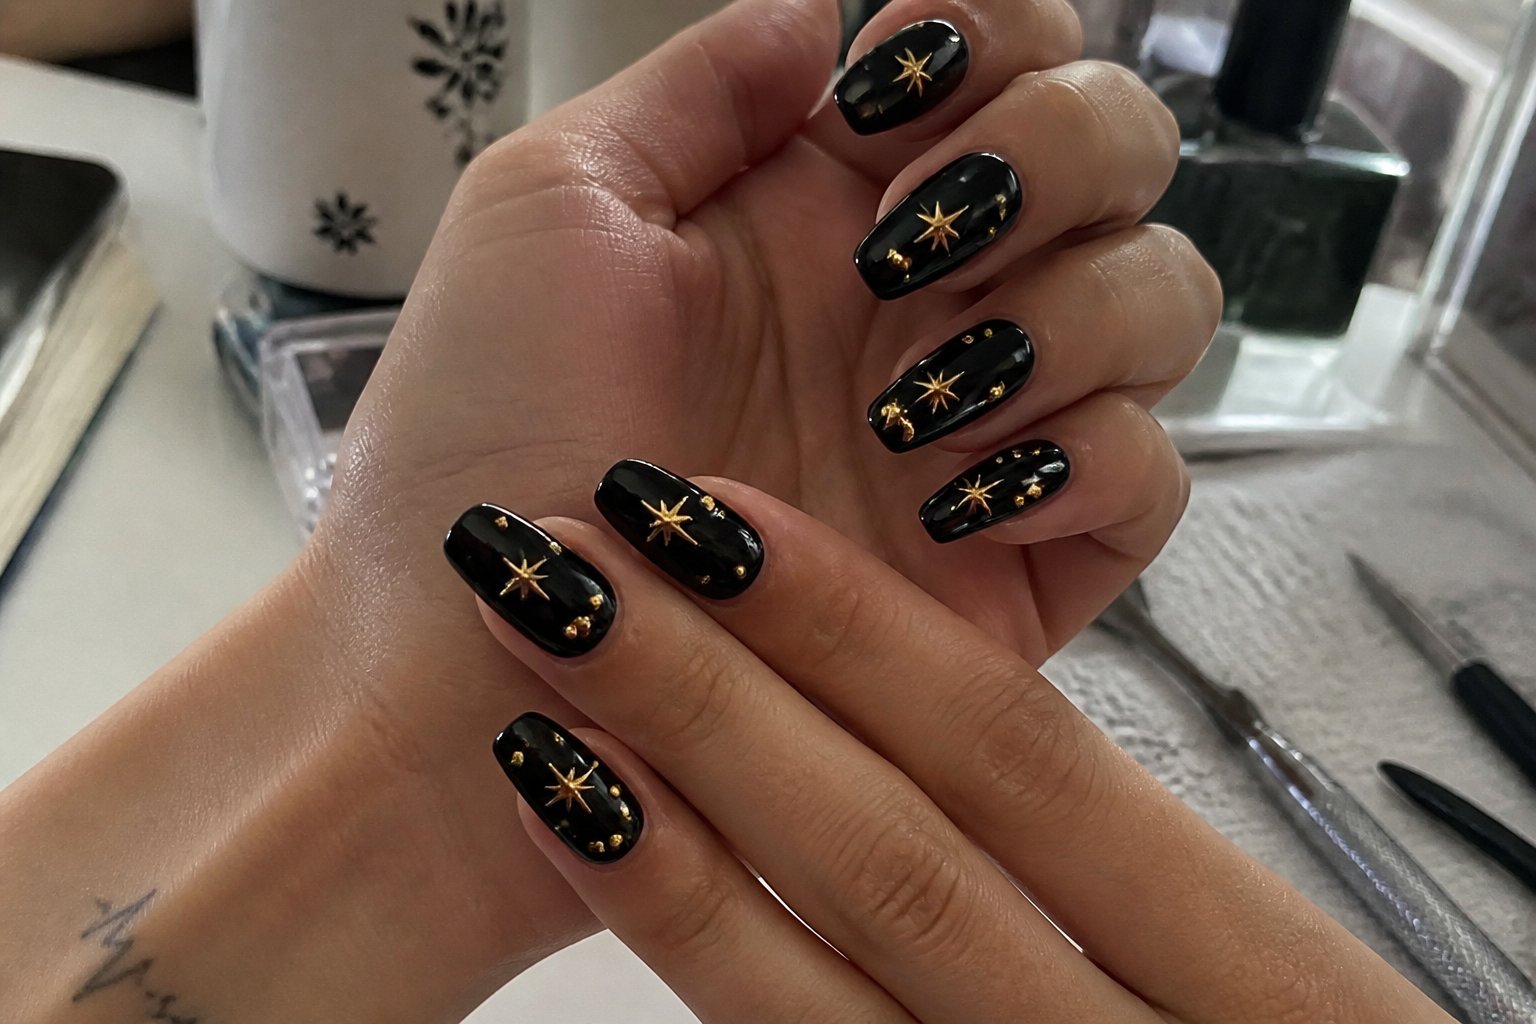
Idea: a deep jelly-black base topped with tiny gold star charms for a night-sky vibe you can wear anywhere. This look uses sheer black gel so light still passes through, giving depth that opaque black lacks.
Start by applying thin, even layers of sheer black jelly gel. Cure each thin layer to avoid bubbles and keep the finish glassy.
Place the gold star charms with tweezers while the top layer is slightly tacky. Press gently and seal with a thin clear overlay; too-thick top coats will flatten charms and kill the 3D effect.
Common mistake: using chunky stars or overcrowding the nail. Stick to small charms on one or two accent nails for balance. Try a mix of full-black and half-jelly nails to keep the set wearable and modern.
8) Glitter-Filled Clear Jelly Nails with Floating Sequins
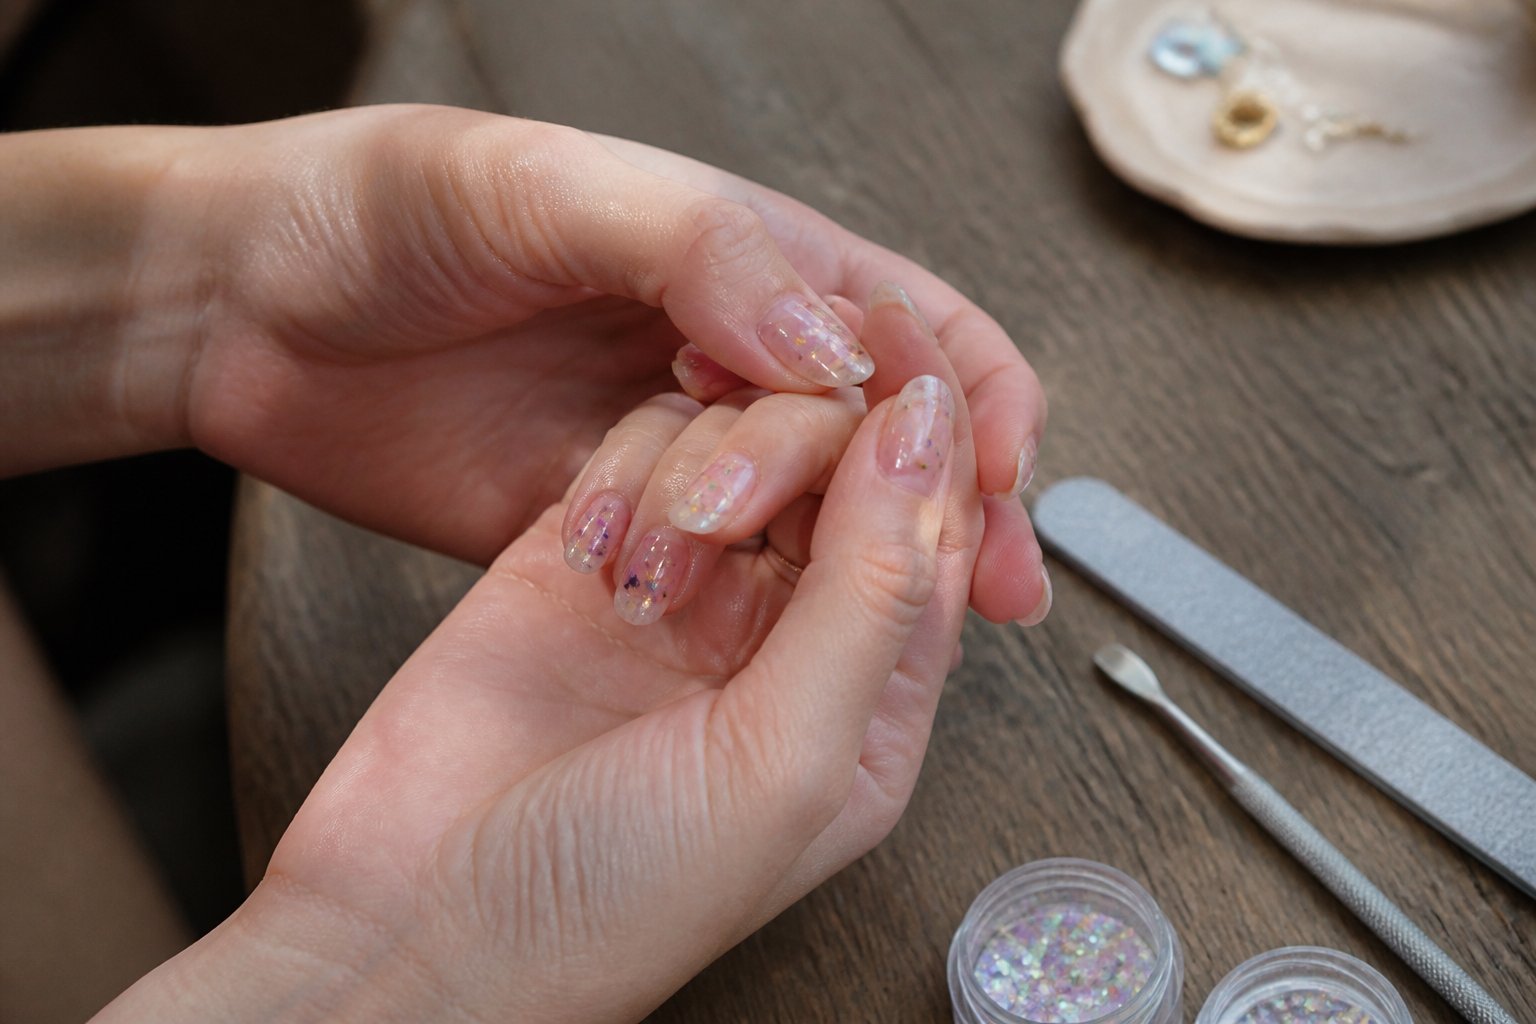
Intent: tutorial and idea.
You learn this look by building a clear jelly base and suspending glitter and sequins inside for depth. Start with a thin clear gel layer, add fine glitter or microflakies, then cure; trap larger sequins between a second and third clear layer so they appear to float.
Pick sequins that lie flat—hex shapes work best—to avoid lifting or snagging. A common mistake is using too-thick sequins or overloading glitter, which causes uneven curing and bumps. File lightly between layers to keep a smooth finish.
For a glossy, glass-like result, finish with a high-shine top coat and cure fully. If you try this at home, use thin layers and check curing times for your products. Want more tips for placement or color combos? Try a soft coral base with gold flakes for a warm, wearable twist.
9) Kawaii Strawberry Jelly Nails with Resin Seed Details
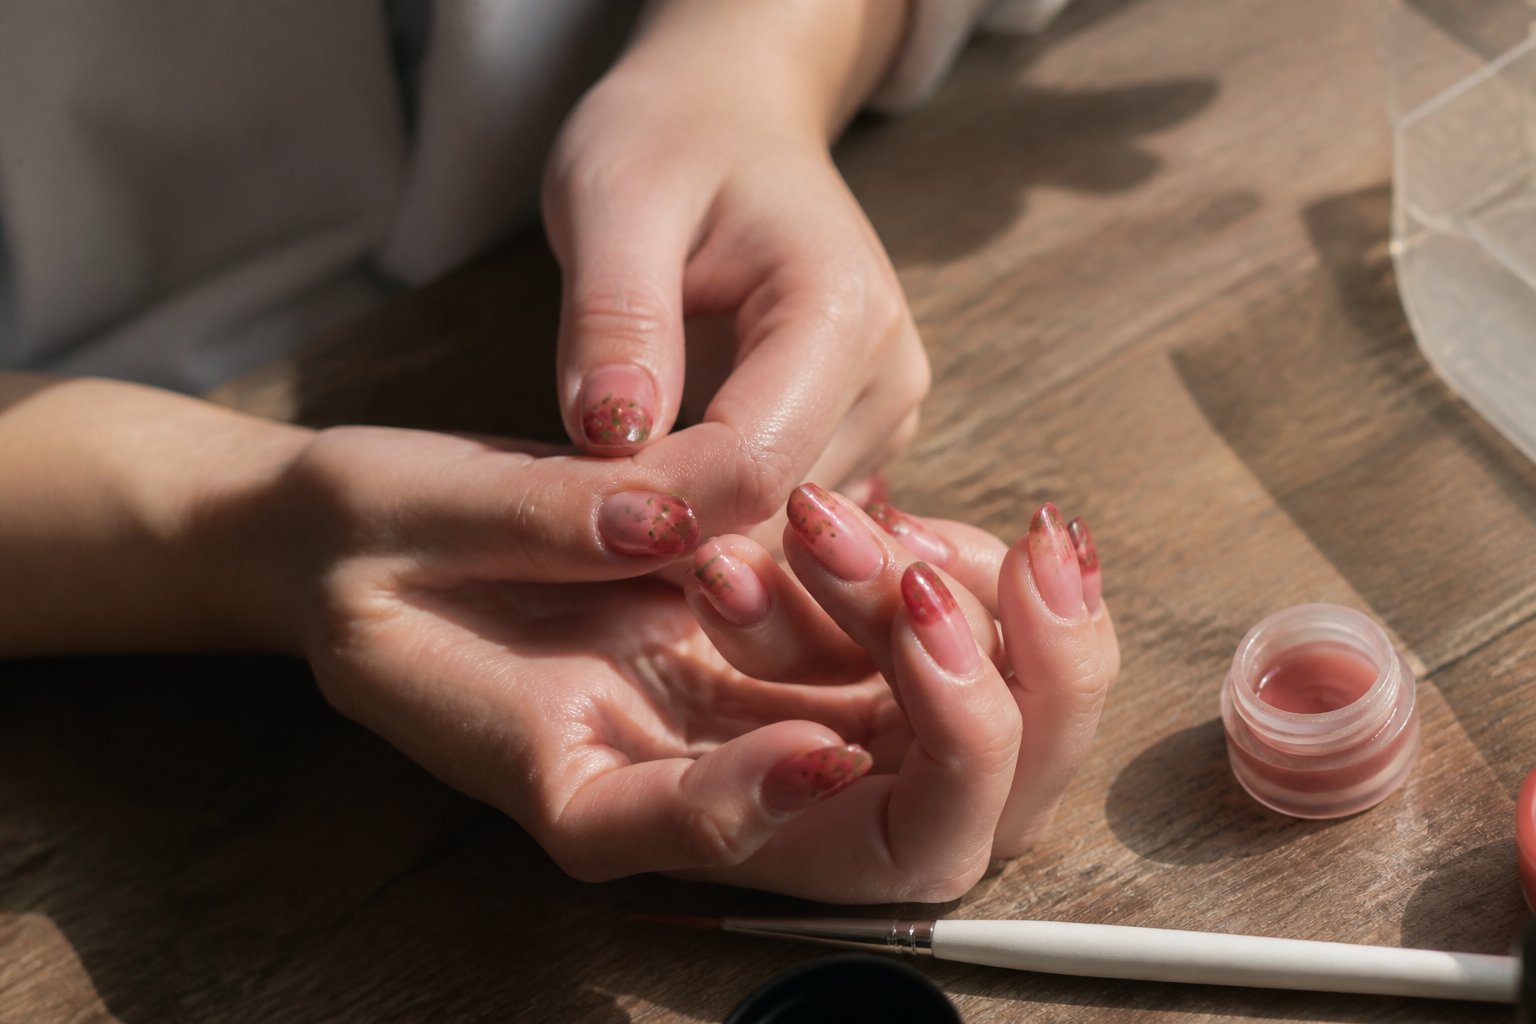
This is a tutorial-style idea you can recreate at home or ask your nail tech to try. Start with a translucent milky pink jelly base so the red and green layers pop without looking too bold.
Use tiny resin dots or clear seed-shaped beads to mimic strawberry seeds. Press them into the tacky layer before curing; placing seeds unevenly gives a handmade, kawaii look but avoid crowding the nail.
Add a glossy dome of jelly gel for depth and a small green leaf accent near the cuticle. Common mistake: making seeds too large — they read clumsy instead of cute. For inspiration and supplies, check kawaii strawberry nail listings to find charms and decals that match your vision.
10) French Jelly Nails: Sheer Nude Base with Opaque White Tips

Intent: tutorial and idea.
Try a sheer nude jelly base topped with clean, opaque white tips for a fresh take on the French. You get the glassy, soft depth of jelly polish while keeping the classic French shape. Ask your tech for a thin sheer layer first; that base gives the manicure that jelly glow without hiding the white tips.
For a pro finish, paint the white tips slightly thicker than usual and cure fully before adding a glossy topcoat. A common mistake is skimping on base layers—too thin and the tips look harsh, too thick and the jelly depth is lost. If you want a twist, add tiny clear dots or a pale iridescent stripe along one nail for subtle 3D pop.
Try this when you want a wearable, modern French that still reads clean and polished. Book your next mani with this photo-ready idea.
Understanding 3D Jelly Nail Art
You’ll learn what materials matter and how the raised, glossy shapes are built. Focus on gel types, tools, and the step-by-step build so your gummy nails look smooth, clear, and long-lasting.
Key Materials and Tools
Intent: guide — choose the right products so your gummy shapes hold their curve and stay bubble-free.
- Builder gel (hard or thick viscous): pick a clear, high-viscosity builder gel labeled for structure. Thicker gel keeps dome shapes from collapsing.
- Thin color jelly polish or sheer gel polish: use translucent shades rather than opaque colors to get that candy-glass look.
- UV/LED lamp: a 48–60 second cure for LED or 2 minutes for traditional UV is typical; follow product specs.
- Gel brush and dotting tool: use a flat brush to smooth surfaces and a rounded dotting tool to place beads precisely.
- Forms or tips: short forms or reusable nail tips give consistent dome height for beginners.
- Rubbing alcohol & lint-free wipes: remove inhibition layer and avoid streaks.
- Nail file and buffer: refine edges and shape the dome before final topcoat.
Common mistake: curing too long or too short creates fogging or soft spots. Test your gel on a spare tip first.
How Gummy Nail Designs Are Crafted
Intent: tutorial — build the dome, lock color in, and finish glossy, tactile shapes.
Start with a clean, prepped natural nail or tip. Apply a thin base gel and cure; this prevents lifting under the dome. Place a sheer color coat and cure for a translucent wash. For the gummy dome, pick a bead of builder gel and set it in the center. Use a rounded brush to push the gel outward in a smooth dome; avoid overworking the bead to prevent air bubbles. Cure the dome in place, then add a second bead if you want extra height or a layered translucent effect.
After curing, lightly file the edges for symmetry. Wipe the inhibition layer, then finish with a high-shine non-wipe topcoat or a cured glossy top gel. Example tip: embed tiny glitter or a micro-flake between layers for trapped depth without ruining clarity. Watch for lifting at the cuticle—avoid gel touching skin to reduce lifting and irritation.
Pro Tips for Long-Lasting Jelly Manicures
Keep nails dry for the first hour, oil cuticles daily, and avoid strong solvents. Small daily habits prevent lifting and keep the jelly gloss bright.
Essential Aftercare Steps
Guide: aftercare.
Right after your manicure, cure gel layers fully if you used gel—under-cure is the main reason jelly lifts. Wait at least 60 minutes before heavy water use when using regular polish; with gel, avoid soaking for the first 2–4 hours to let layers bond.
Use cuticle oil twice daily to stop chips at the edges. Apply a thin layer and rub it into the nail and surrounding skin. When washing dishes or using cleaning spray, wear gloves to keep polish from weakening.
File only the free edge to maintain the smooth jelly dome. If a small nick appears, seal it with a thin topcoat the same day. For gel jelly, schedule fills every 2–3 weeks to keep the 3D shapes looking full.
Common Mistakes to Avoid
Guide: troubleshooting.
Skipping nail prep ruins adhesion. Always dehydrate the nail plate with a lint-free wipe and a light buff before primer or base. Greasy nails, lotion left on cuticles, or heavy oils cut bonding power.
Don’t apply thick layers in one pass. Thick gels cure unevenly and collapse; build jelly depth in thin layers and cure each layer fully. Avoid heavy hand use for 24 hours after a fresh set—typing and opening cans cause early chips.
Using acetone often will dull the jelly shine. Remove polish gently or get professional fills instead of repeatedly taking the whole set off. If you see lifting at one corner, fix it right away—water will work into the gap and wreck the whole nail.